

Frequently asked questions
Step-by-step answers for setting up and using Mailan. Questions that belong together are grouped, with the details indented below.
How do I set up the Google Sheets integration?
With the Google Sheets integration, Mailan writes every submission as a new row into a Google spreadsheet. Mailan creates the header row itself and extends it as soon as your form gets new fields.
Setting it up has two parts and takes about ten minutes:
At Google (once, in the Google Cloud Console):
- Enable the Google Sheets API
- Create a service account and download its JSON key
- Share the spreadsheet with the service account
In Mailan (per form):
It costs nothing: the Google Sheets API is free at normal form volumes.
Why a service account? Mailan writes in the background, also while you are signed out. That needs a technical Google identity of its own, the service account. It only sees the spreadsheets you explicitly share with it and nothing else in your Google account.
Google: How do I enable the Google Sheets API?
- Open the Google Cloud Console and sign in with your Google account.
- Pick a project in the project selector at the top left, or create one with New project, for example
mailan-sheets. - Open the Google Sheets API in the library and click Enable.
Make sure the project selected at the top is the same one you create the service account in next. After enabling, the API can take a minute or two to become available.
Google: How do I create a service account and get the private key?
The private key is not part of the spreadsheet; it comes from a key file of the service account:
- In the Cloud Console, open IAM & Admin → Service accounts and click Create service account.
- Enter a name, for example
mailan-sheets, and click Create and continue. Skip roles and user access, the service account needs no project permissions. Finish with Done. - Click the new service account in the list, switch to the Keys tab and choose Add key → Create new key.
- Choose the type JSON and click Create. Your browser downloads a file such as
mailan-sheets-a1b2c3.json.
The file contains the two values Mailan needs:
"client_email": "mailan-sheets@your-project.iam.gserviceaccount.com",
"private_key": "-----BEGIN PRIVATE KEY-----\nMIIEv…\n-----END PRIVATE KEY-----\n",
Important: Google offers the download only this once. Keep the file safe and do not share it: whoever has it can write to every spreadsheet shared with the service account. If it gets lost, delete the key in the Keys tab and create a new one.
The right file? The key file contains "type": "service_account". A file with client_secret and "web" or "installed" is an OAuth client, which Mailan cannot use.
"Service account key creation is disabled"? A policy of your Google Workspace organisation blocks keys (iam.disableServiceAccountKeyCreation). An administrator can lift it for this project under IAM & Admin → Organization policies. Alternatively, create the project with a personal Google account.
Mailan: How do I connect the spreadsheet to my form?
- In the dashboard, open your form under Forms and switch to the Processing → Integrations tab.
- In the Google Sheets card, click Activate now.

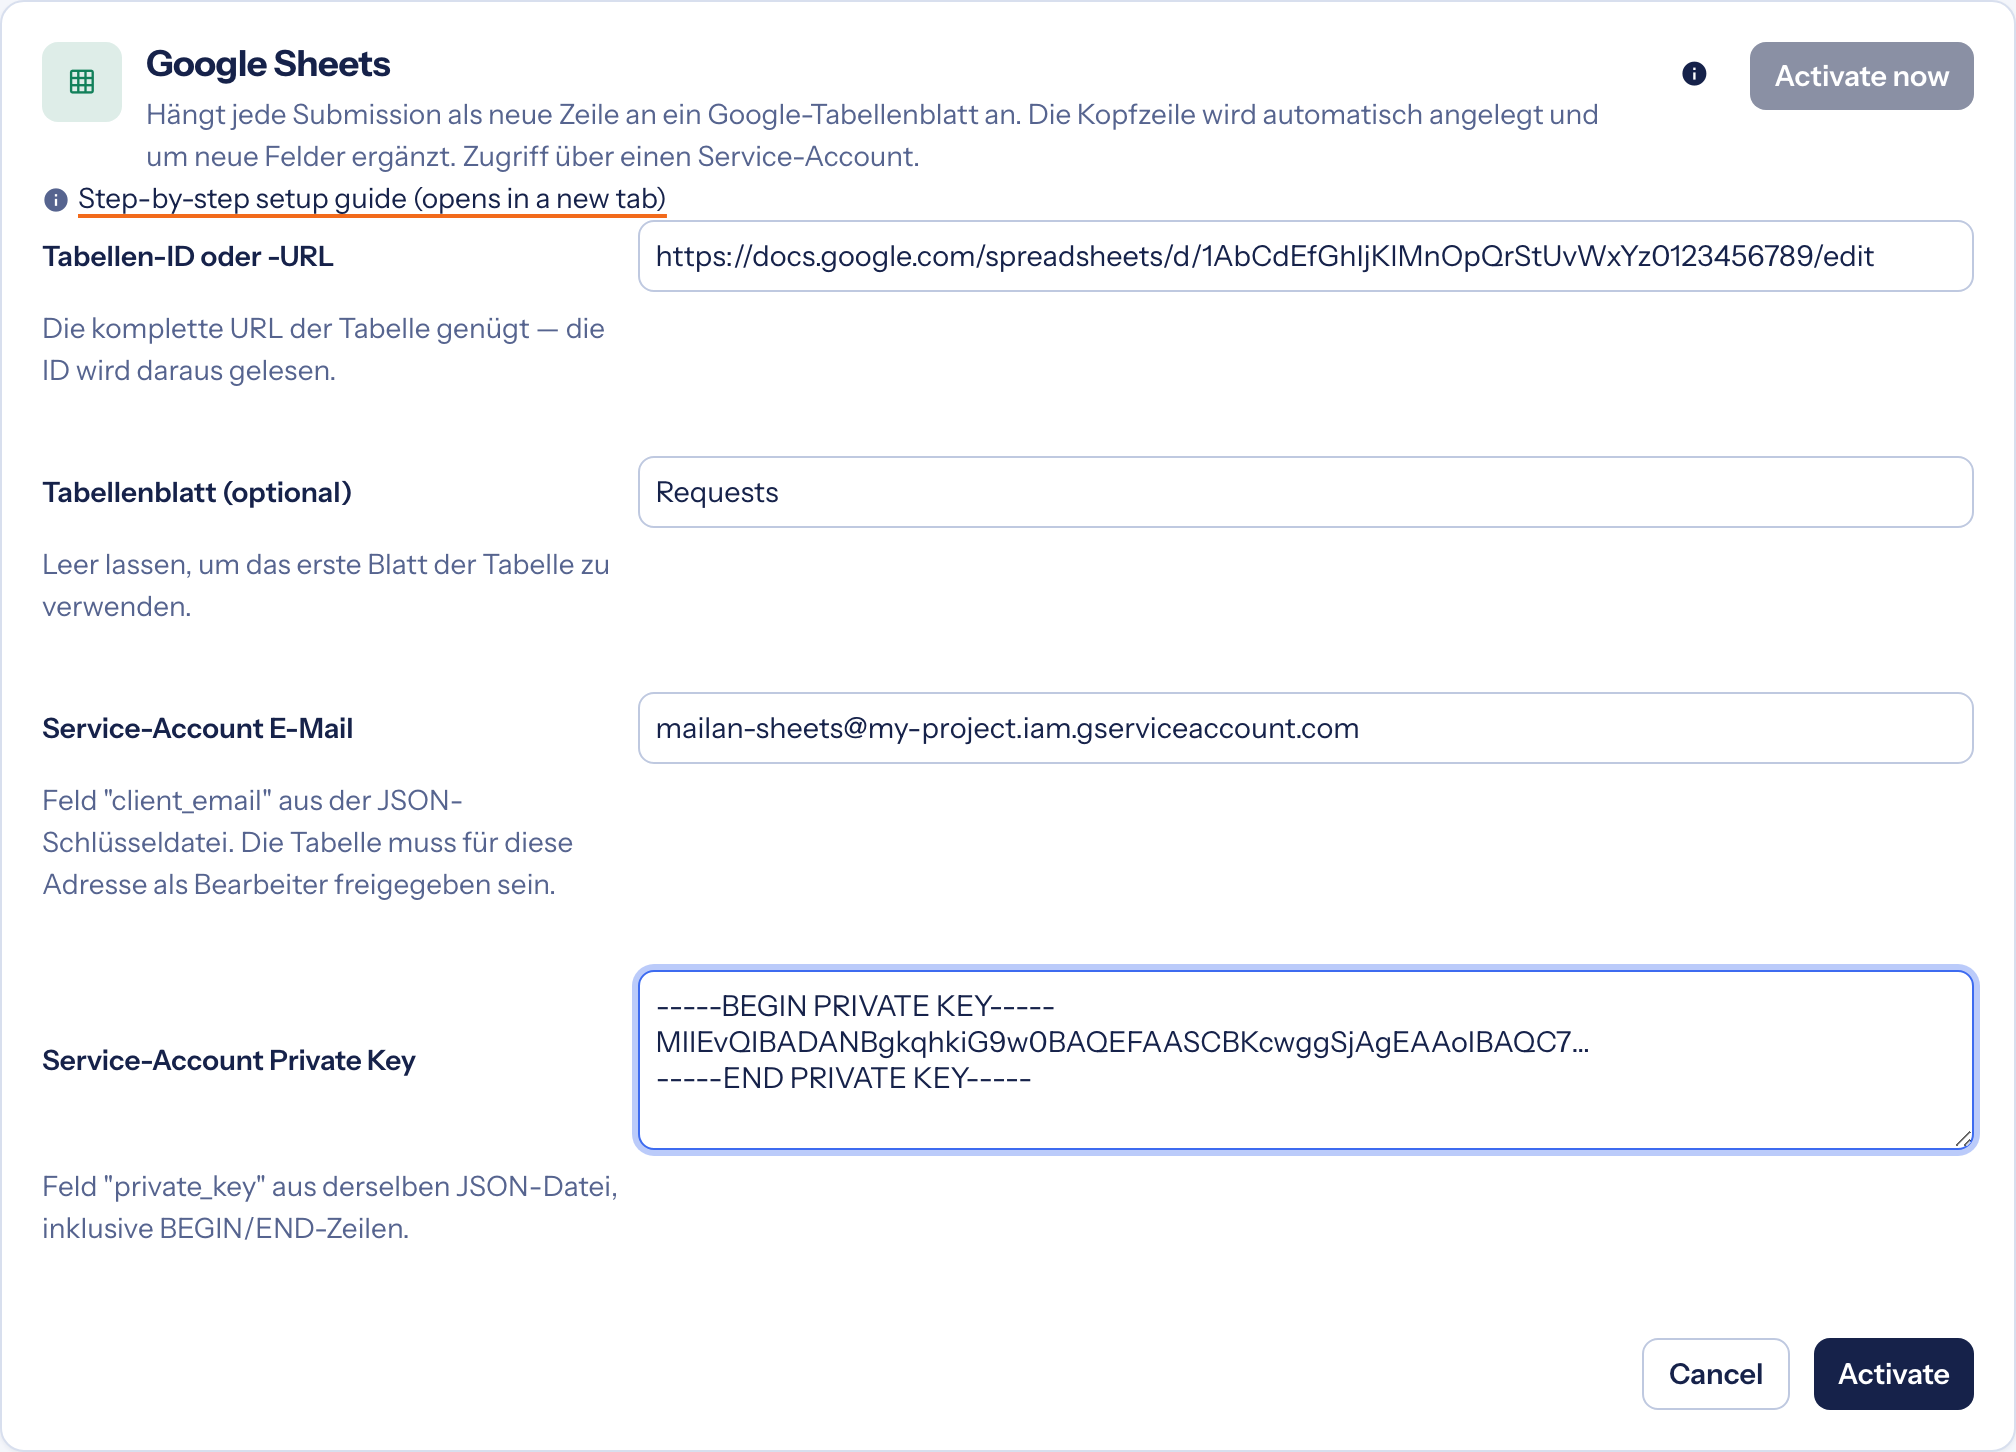
- Fill in the four fields (their labels are currently shown in German):
- Tabellen-ID oder -URL (spreadsheet ID or URL): simply copy the spreadsheet's address from the browser's address bar (
https://docs.google.com/spreadsheets/d/…). Mailan extracts the ID itself. - Tabellenblatt (optional) (sheet): the name of the tab at the bottom of the spreadsheet, for example
Requests. Leave it empty for the first sheet. - Service-Account E-Mail: the value of
client_emailfrom the JSON file. - Service-Account Private Key: the value of
private_keyfrom the JSON file, including the lines-----BEGIN PRIVATE KEY-----and-----END PRIVATE KEY-----. Whether the line breaks arrive as\nor as real line breaks does not matter.
- Click Activate.
- Click Test connection. Mailan signs in with Google and writes the header row without adding a submission. When "Connection works." appears, you are all set. Otherwise the reason is shown right below the settings; see What do the error messages mean?
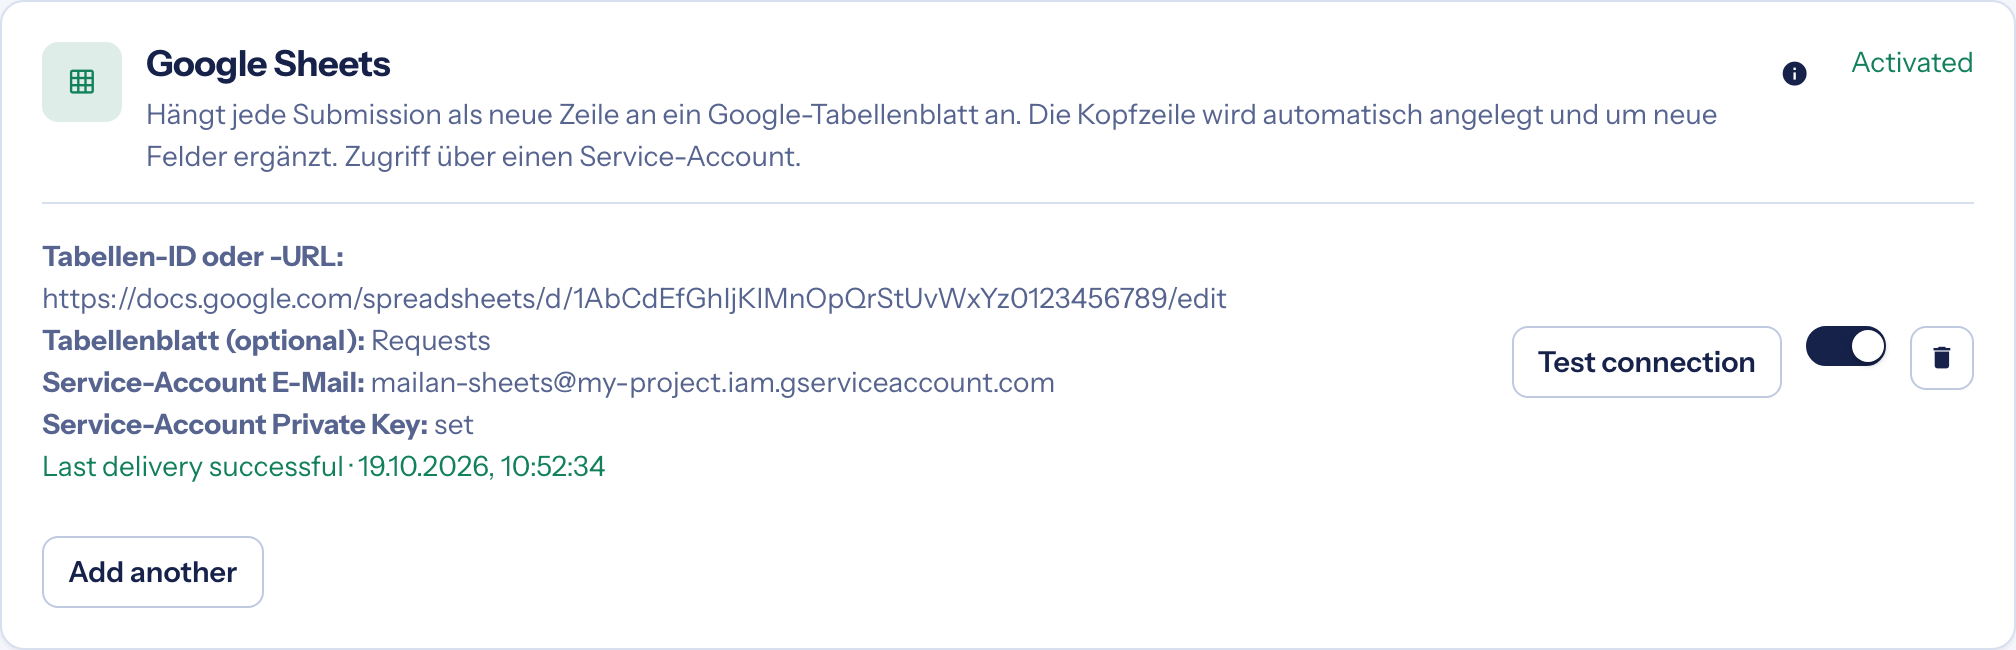
From now on every new submission lands as a row in the spreadsheet. The switch on the right pauses the integration without deleting its settings. Add another writes to a second spreadsheet as well. For security, Mailan never shows the private key again after saving.
Which columns end up in the spreadsheet?
- In an empty spreadsheet, Mailan first creates the header row, starting with Zeitpunkt (time of submission) and Formular (form name).
- Then follows one column per form field, named after the field (
name,email,message…). - If a new field appears later, Mailan appends a column on the right. Existing columns stay where they are.
You may reorder the header row or insert columns of your own: Mailan places every new row by the names in the header row, not by position. Do not rename a column, though — Mailan would then create a new one for that field.
What do the error messages mean?
If the connection test or a delivery fails, the reason is shown below the integration's settings:
- "Anmeldung bei Google fehlgeschlagen" (sign-in failed): email and private key do not belong together, the key was copied incompletely, or the key was deleted in the Cloud Console. Copy both values again from the same JSON file.
- "Die Google Sheets API ist … nicht aktiviert" (API not enabled): enable the API in the service account's project, see Enable the Google Sheets API. Then wait a minute or two.
- "Keine Schreibrechte" (no write access): the spreadsheet is not shared with the service account address, or only for viewing — see Share the spreadsheet.
- "Tabelle nicht gefunden" (spreadsheet not found): the URL or ID is wrong, or the spreadsheet was deleted.
- "Das angegebene Tabellenblatt gibt es … nicht" (sheet does not exist): the name in the Tabellenblatt field differs from the tab in the spreadsheet. Upper and lower case matter.
- "Google-Limit … erreicht" (rate limit reached): too many writes in a short time. Mailan retries the delivery automatically.
Mailan tries every delivery up to five times, spread over about half a minute. If it still fails, that submission is missing from the spreadsheet. It is not lost, though: it stays stored in the dashboard on the form's Overview tab and can be exported as CSV there. After every change to the setup, use Test connection to check that everything works again.
How do I set up the Notion integration?
With the Notion integration, Mailan creates every submission as a new entry in a Notion database. Mailan adds missing columns itself as soon as your form gets new fields.
Setting it up has two parts and takes about five minutes:
In Notion (once):
In Mailan (per form):
The Notion API is free and available on every Notion plan.
Why an integration of its own? Mailan writes in the background, also while you are signed out. That needs a technical access to Notion of its own, the integration. It only sees the pages and databases you explicitly connect to it and nothing else in your workspace.
Notion: How do I create an integration and get its secret?
- Open notion.so/profile/integrations and sign in with your Notion account.
- Click New integration.
- Enter a name, for example
Mailan, choose the workspace that holds your database under Associated workspace and keep the type Internal. Click Save. - Open the new integration. Under Configuration you find the Internal Integration Secret. Click Show, then Copy. The secret starts with
ntn_(older ones withsecret_). - Further down under Capabilities, check that Read content, Update content and Insert content are ticked. That is the default. Mailan needs all three: read to know the columns, update to add missing columns, and insert to write entries. If you changed anything, click Save.
Important: Whoever has the secret can write to every page and database connected to the integration. Do not pass it on. If it got into the wrong hands, create a new one with Refresh under Configuration and enter it in Mailan.
No "New integration" button? Only workspace owners may create integrations. Ask the person with that role to create the integration for you and give you the secret.
Notion: How do I connect the database to the integration?
Mailan writes into a database (also called a table in Notion), not into a regular page. If you do not have one yet, type /database on a page and create a full-page database. An empty database is ideal; Mailan adds the columns.
Connect the integration: At first the integration sees nothing. You have to give it access to the database:
- Open the database as a full page.
- Click ••• in the top right, then Connections.
- Search for your integration, for example
Mailan, select it and confirm.
If you connect the page that holds the database instead, the connection also covers everything below it.
Copy the link: Click ••• again and then Copy link, or copy the address from the browser's address bar. The link looks roughly like this:
https://www.notion.so/your-workspace/0f3c9a7e5b2d4e8f9a1b6c3d7e2f4a5b?v=…The 32 characters before ?v= are the database ID. Mailan extracts it itself, so you can paste the whole link.
Embedded database? If the database sits in the middle of a page, the page's link does not lead to the database. Open the database with Open as full page from the menu at its title, then copy the link.
Mailan: How do I connect the database to my form?
- In the dashboard, open your form under Forms and switch to the Processing → Integrations tab.
- In the Notion card, click Activate now.

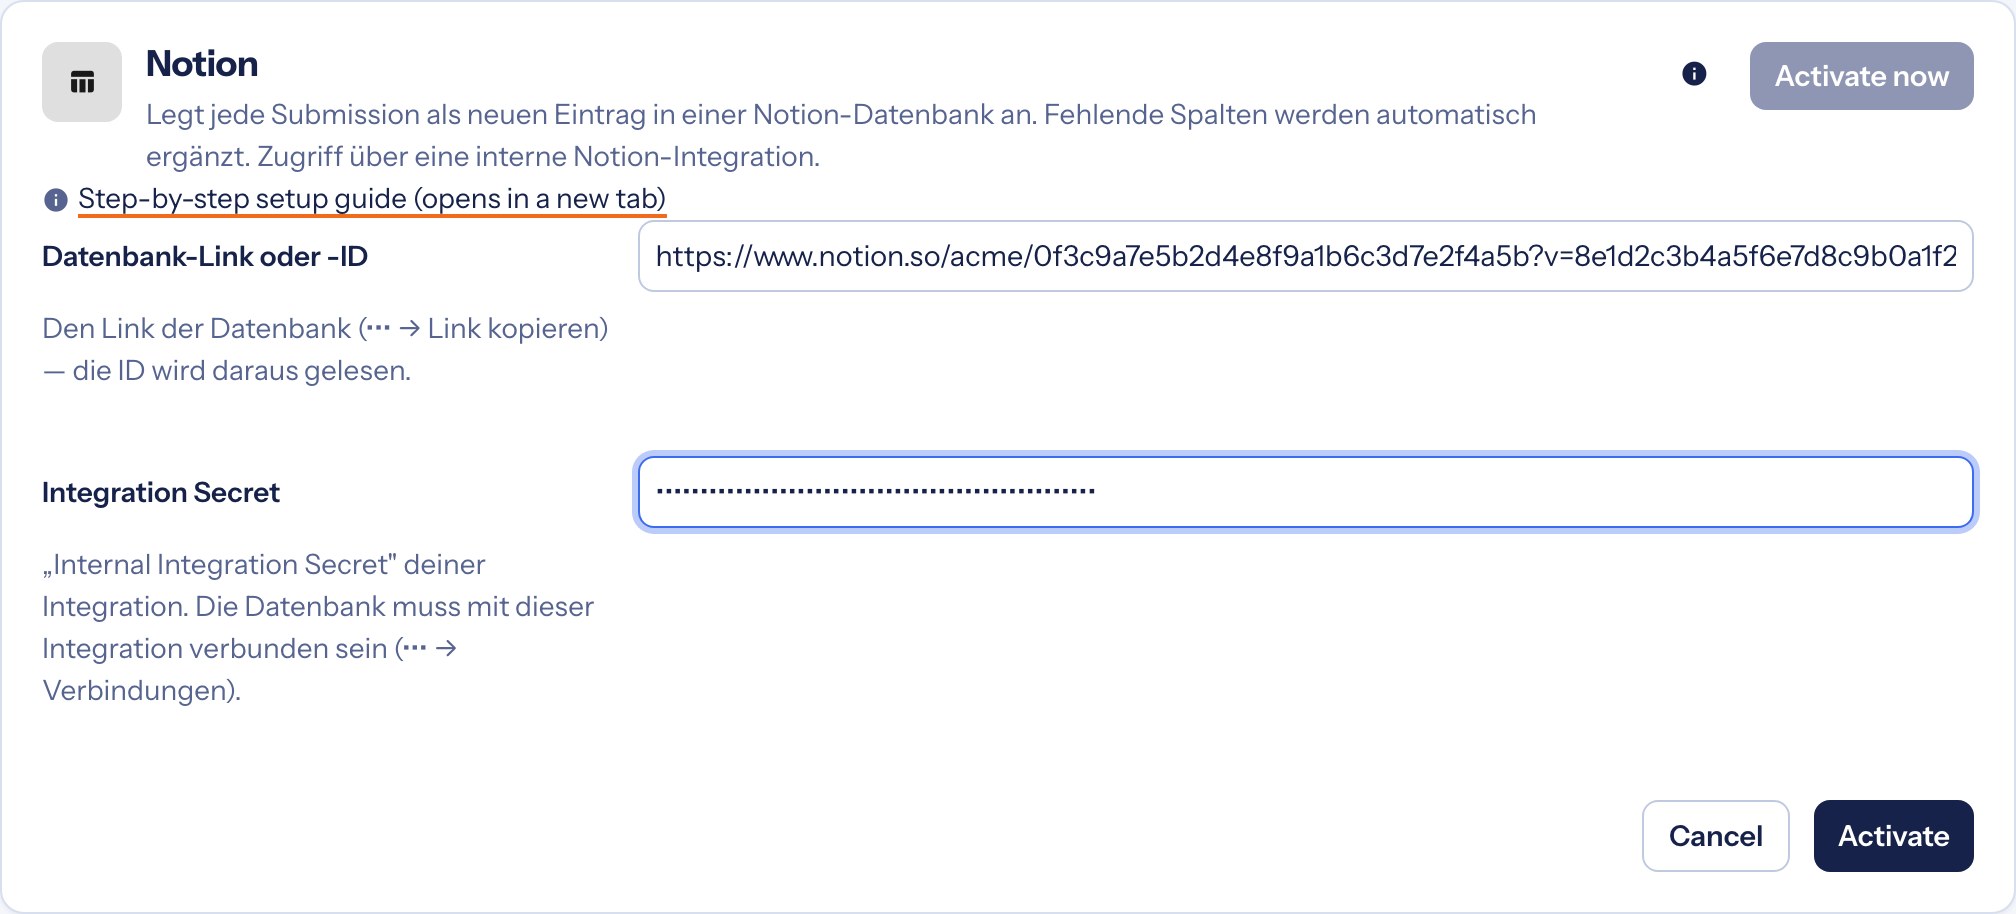
- Fill in the two fields (their labels are currently shown in German):
- Datenbank-Link oder -ID (database link or ID): the link you copied in Notion.
- Integration Secret: the secret of your integration, starting with
ntn_.
- Click Activate.
- Click Test connection. Mailan reads the database and adds the columns Zeitpunkt (time) and Formular (form) without writing an entry. When "Connection works." appears, you are all set. Otherwise the reason is shown right below the settings; see What do the error messages mean?
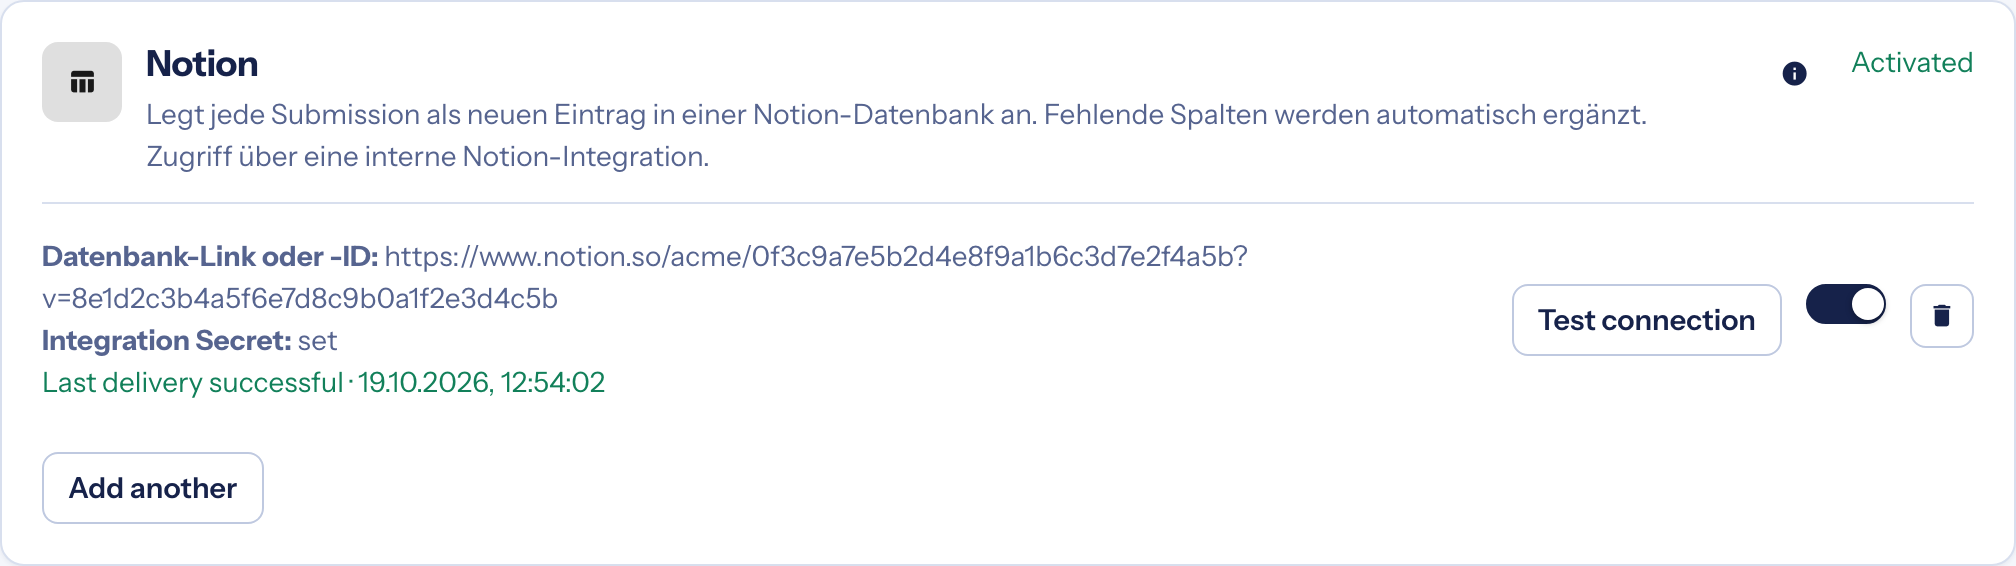
From now on every new submission lands as an entry in the database. The switch on the right pauses the integration without deleting its settings. Add another writes to a second database as well. For security, Mailan never shows the secret again after saving.
Which columns end up in the database?
- Mailan adds missing columns itself: Zeitpunkt (time) as a date, Formular (form) as a select, and a text column named after each form field (
email,message…). - If a new field appears later, Mailan adds another column. Existing columns stay as they are.
- Title: Every Notion entry has a title column (called Name in new databases). If your form has a field with exactly that name, it goes there. Otherwise Mailan takes the first filled-in field among
name,emailorsubjectand also writes it to its own column. If there is none of them, the title is the form's name.
Changing a column type: You can change a column's type in Notion at any time, for example email to Email, budget to Number or topic to Select. Mailan writes each value the way the type requires. Supported are text, number, checkbox, email, URL, phone, date, select and multi-select. In a multi-select, a comma separates the values.
If a value does not fit the type, for example abc in a number column, only that cell stays empty; the entry is created anyway. Columns Notion computes itself (formula, rollup, created time …) as well as status, relations, people and files are left out.
Do not rename a column, or Mailan adds a new one for the field. You may reorder the columns freely.
What do the error messages mean?
If the connection test or a delivery fails, the reason is shown below the integration's settings. The messages are currently in German:
- "Notion lehnt den Integration-Token ab" (Notion rejects the token): the secret was copied incompletely, renewed with Refresh, or the integration was deleted. Copy the current secret again, see Create an integration.
- "Datenbank nicht gefunden" (database not found): usually the database is not connected to the integration yet, see Connect the database. Less often the link is wrong or the database was deleted.
- "Der Link führt zu einer Notion-Seite, nicht zu einer Datenbank" (the link leads to a page): you copied the link of the surrounding page. Open the database with Open as full page and copy its link.
- "Der Integration fehlen Rechte" (missing capabilities): one of Read, Update or Insert content is unticked under Capabilities in the integration's settings.
- "Diese Datenbank hat mehrere Datenquellen" (multiple data sources): Notion now allows several sources in one database. Mailan does not support that yet; use a database with a single source.
- "Notion hat die Daten abgelehnt" (Notion rejected the data): a value does not fit a column Notion validates strictly. Notion's own reason follows in brackets.
- "Notion-Limit für Anfragen erreicht" (rate limit): too many requests in a short time. Mailan retries the delivery automatically.
Mailan tries every delivery up to five times, spread over about half a minute. If it still fails, that submission is missing in Notion. It is not lost, though: it stays stored in the dashboard in the form's Overview tab and can be exported there as CSV. After every change to the setup, use Test connection to check that everything works again.
How do I set up the Zapier integration?
With the Zapier integration, Mailan hands every submission to a Zap. From there it can go to any of the more than 7,000 apps Zapier connects, such as a CRM, Trello, Mailchimp or a spreadsheet. Every form field arrives as a value of its own that you can map freely in the Zap.
Setup has three steps and takes about ten minutes:
- Create a Zap with the "Catch Hook" trigger in Zapier
- Enter the webhook URL in Mailan and test it
- Map the fields in the Zap and publish it
Zapier plan: the Webhooks by Zapier trigger is a premium app. It is only available on paid Zapier plans, not on the free one.
On the Mailan side, the Zapier integration is included in the Pro plan.
Zapier: How do I create the Zap?
- Sign in at zapier.com and click Create → Zaps.
- Click the trigger step, search for Webhooks by Zapier and select it.
- Choose Catch Hook as the Trigger event and click Continue.
- Leave Pick off a Child Key empty and click Continue again.
- In the Test tab, Zapier now shows the Webhook URL. It starts with
https://hooks.zapier.com/hooks/catch/. Copy it with Copy.
Leave the Zap open as it is and enter the URL in Mailan. Then come back here and continue with Test trigger.
Treat the URL like a password. Anyone who knows it can send data to your Zap. That is why Mailan stores it encrypted and does not show it again once saved.
Mailan: How do I connect the Zap to my form?
- In the dashboard, open your form under Forms and switch to the Processing → Integrations tab.
- Click Activate now on the Zapier card.

- Paste the URL you copied in the Zap into Zapier-Webhook-URL and click Activate.
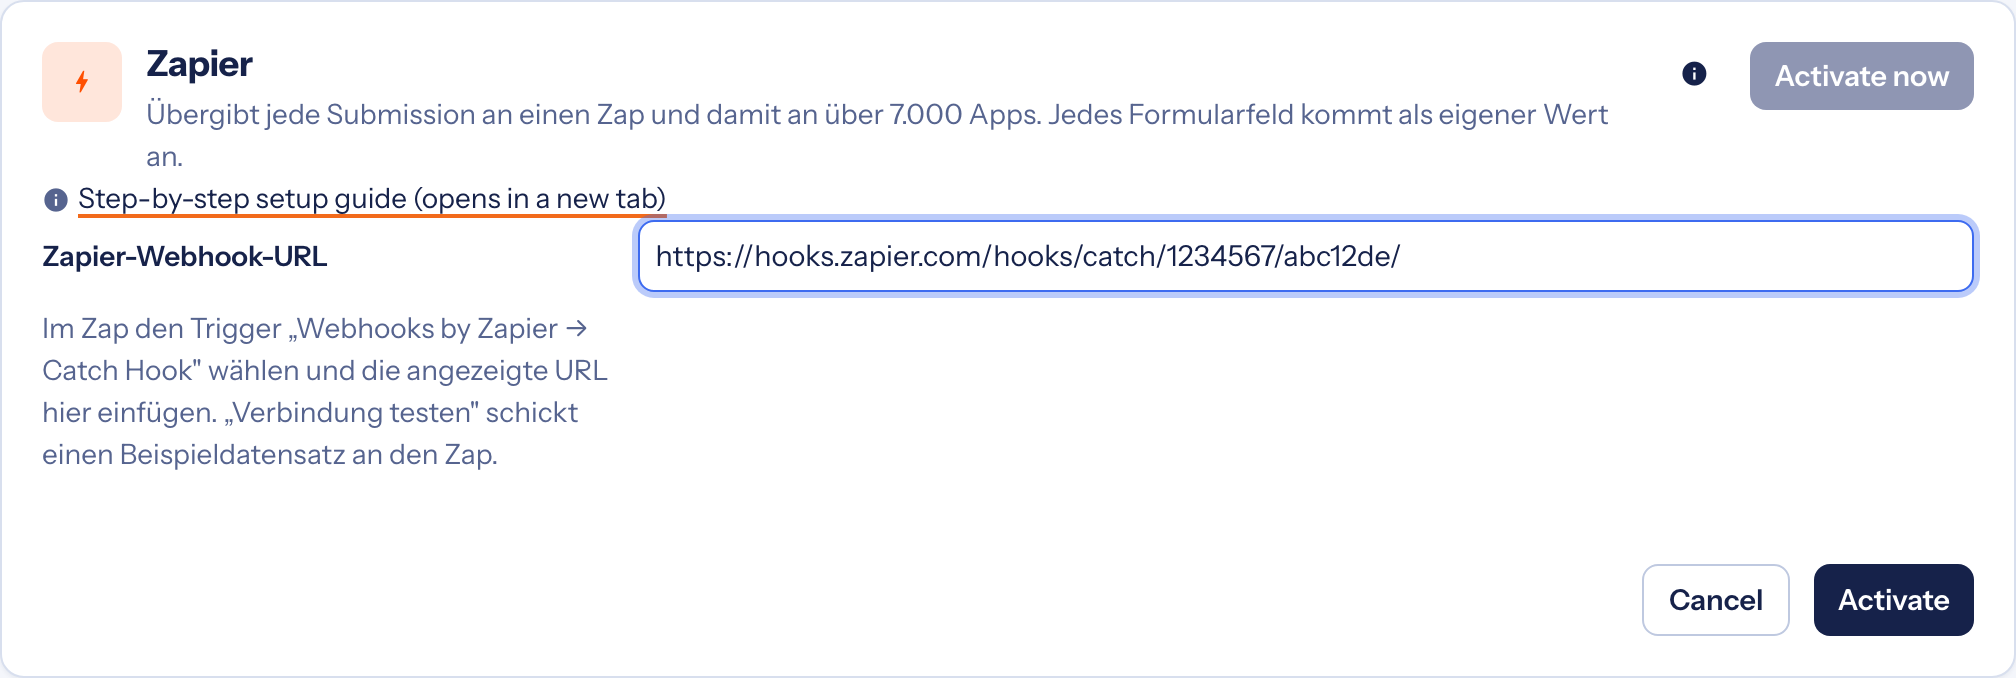
- Click Test connection. Mailan sends a sample record with the values Zeitpunkt (time), Formular (form, here "Mailan-Verbindungstest") and test to the Zap. If "Connection works." appears, Zapier accepted the URL. Otherwise the reason is shown right below the settings; see What do the error messages mean?
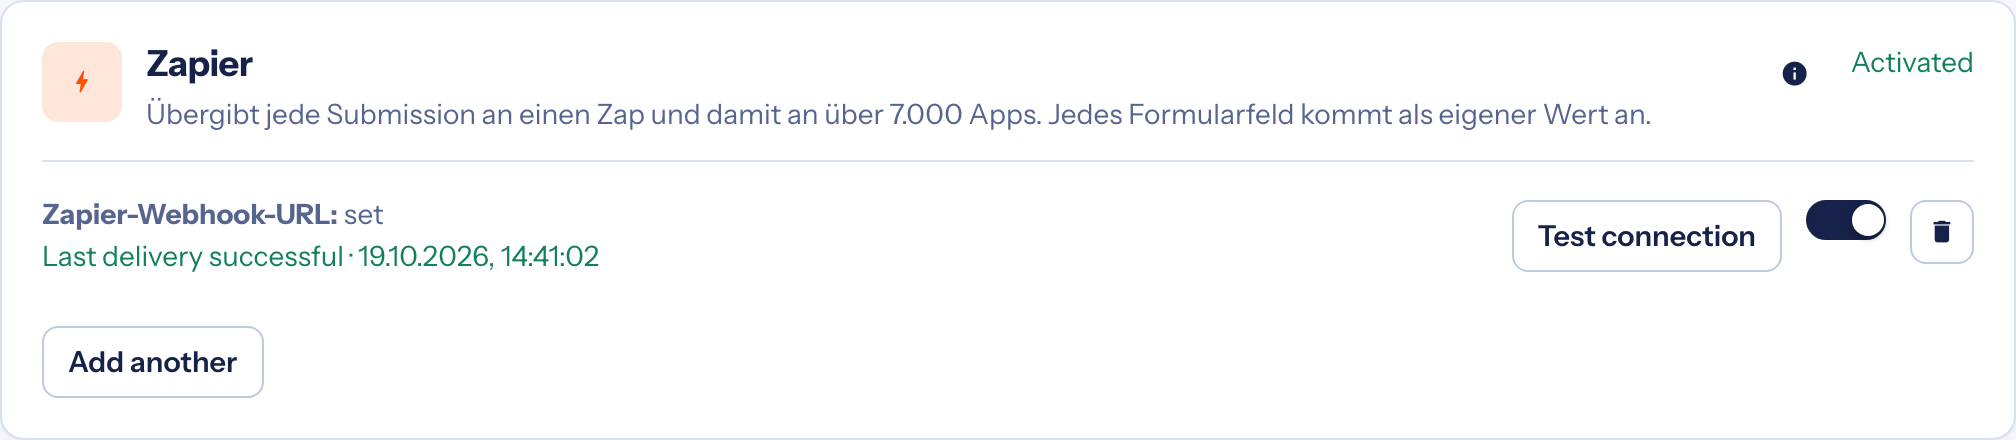
The switch on the right pauses the integration without deleting its settings. With Add another you feed a second Zap from the same form.
Tip: after the connection test, submit your real form once. Zapier then knows all of your form's fields, and you can map them in the next step.
Zapier: How do I map the fields?
Back in the Zap:
- In the trigger's Test tab, click Test trigger. Zapier lists the records received so far. Select the real submission, not the connection test.
- Click Continue with selected record and add the action step, for example "Create Contact" in your CRM.
- Map the fields in the action. Mailan delivers every submission like this:
- Zeitpunkt: time the submission arrived (ISO 8601, UTC), e.g.
2026-10-19T10:00:00.000Z - Formular: name of the form in Mailan
- every form field under its
namefrom the HTML, e.g.emailormessage
Fields with several values (such as checkboxes sharing a name) arrive as a list. If a form field is itself called Zeitpunkt or Formular, the value from the form wins.
- Test the action and click Publish. Only a published Zap processes new submissions.
If your form gets a new field later, submit it once and load new records with Test trigger, so Zapier offers the field for mapping.
What do the error messages mean?
If the connection test or a delivery fails, the reason is shown below the integration's settings. The messages are currently in German:
- "Das ist keine Zapier-Webhook-URL" (not a Zapier webhook URL): the address does not start with
https://hooks.zapier.com/hooks/catch/. Often it is the link to the Zap editor by mistake. Copy the URL from the trigger's Test tab, see Create the Zap. - "Zapier kennt diese Webhook-URL nicht" (Zapier does not know this URL): the Zap or its trigger was deleted, or the URL is incomplete. Create the trigger again and enter the new URL.
- "Zapier nimmt gerade keine weiteren Anfragen an" (rate limit): Zapier limits how many requests a webhook accepts in a short time. Mailan retries automatically.
- "Zapier ist gerade nicht erreichbar" (Zapier unavailable): an outage at Zapier. Mailan retries automatically.
The test works, but nothing happens in the Zap? Then it is usually the Zap itself: it is not published yet or switched off, or your Zapier plan does not include premium apps. Zap history in Zapier shows whether the submission arrived and where a step failed.
Mailan tries every delivery up to five times, spread over about half a minute. If it still fails, that submission is missing in the Zap. It is not lost, though: it stays stored in the dashboard in the form's Overview tab and can be exported there as CSV.
How do I set up the Airtable integration?
With the Airtable integration, Mailan adds every submission as a new record to an Airtable table. Mailan adds missing fields by itself as soon as your form gets new fields.
Setup has two parts and takes about five minutes:
In Airtable (once):
In Mailan (per form):
The Airtable API is available on every Airtable plan, including the free one, where it is limited to 1,000 calls a month. Mailan needs at least two per submission, so that is enough for about 500 submissions a month. On the Mailan side, the Airtable integration is included in the Pro plan.
Airtable: How do I create a personal access token?
Mailan writes in the background, even when you are not signed in. That needs its own access, the personal access token. It may only do what you allow, and only in the bases you grant it.
- Open airtable.com/create/tokens and click Create new token (or Create token).
- Enter a name, for example "Mailan".
- Under Scopes, add these three with Add a scope:
data.records:write: create recordsschema.bases:read: read tables and fieldsschema.bases:write: create missing fields
- Under Access, add the base Mailan should write to with Add a base.
- Click Create token and copy the token. It starts with
patand is shown only this once.
Treat the token like a password. Mailan stores it encrypted and does not show it again once saved. If you lose it, simply create a new one.
Airtable: Where do I find the table's link?
- Open the base in Airtable and click the tab of the table the submissions should go to. You can also create a new, empty table for this.
- Copy the address from the browser's address bar. It looks roughly like this:
https://airtable.com/appXXXXXXXXXXXXXX/tblXXXXXXXXXXXXXX/viwXXXXXXXXXXXXXX
Mailan reads the base (app…) and the table (tbl…) from it. Which view (viw…) is open does not matter.
Note: the link from Share leads to a public share (
shr…) and contains no table ID. Use the address from the address bar.
Mailan: How do I connect the table to my form?
- In the dashboard, open your form under Forms and switch to the Processing → Integrations tab.
- Click Activate now on the Airtable card.

- Fill in the two fields:
- Tabellen-Link (table link): the link you copied in Airtable.
- Personal Access Token: the token, starting with
pat.
- Click Activate.
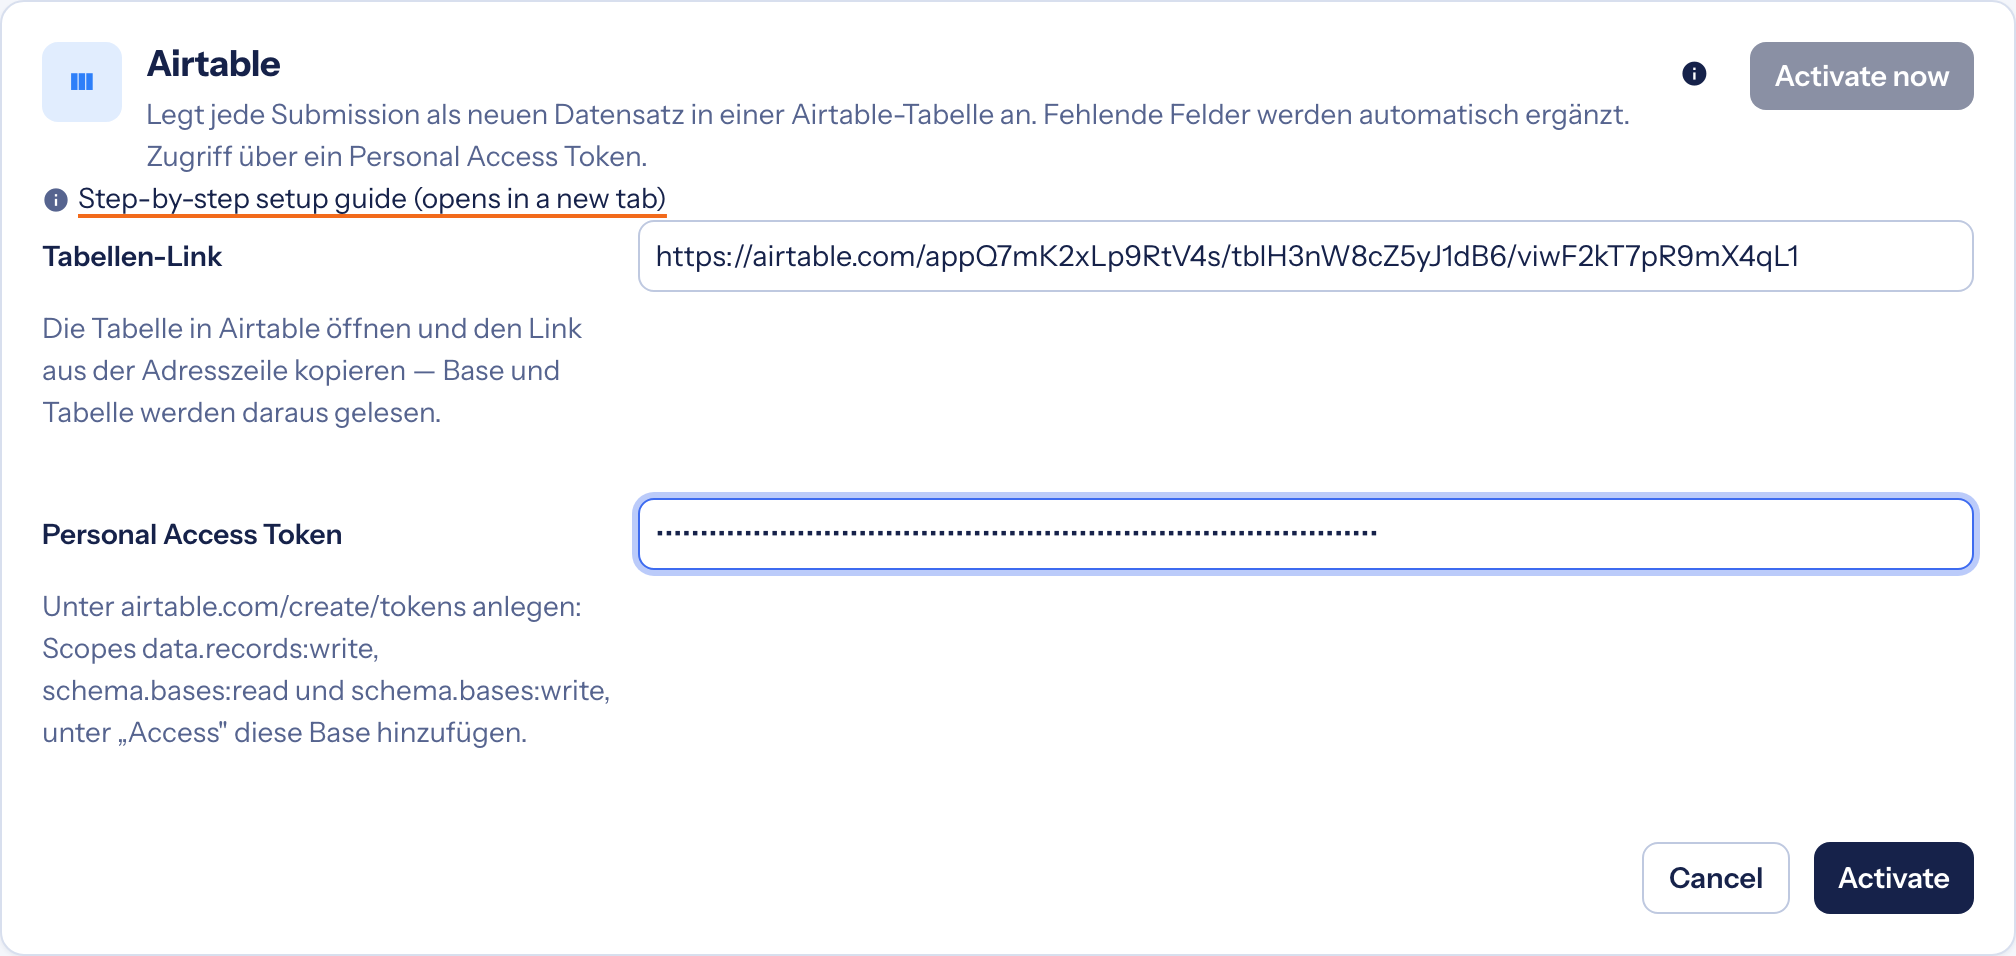
- Click Test connection. Mailan reads the table and creates the fields Zeitpunkt (time) and Formular (form) without writing a record. If "Connection works." appears, everything is ready. Otherwise the reason is shown right below the settings; see What do the error messages mean?
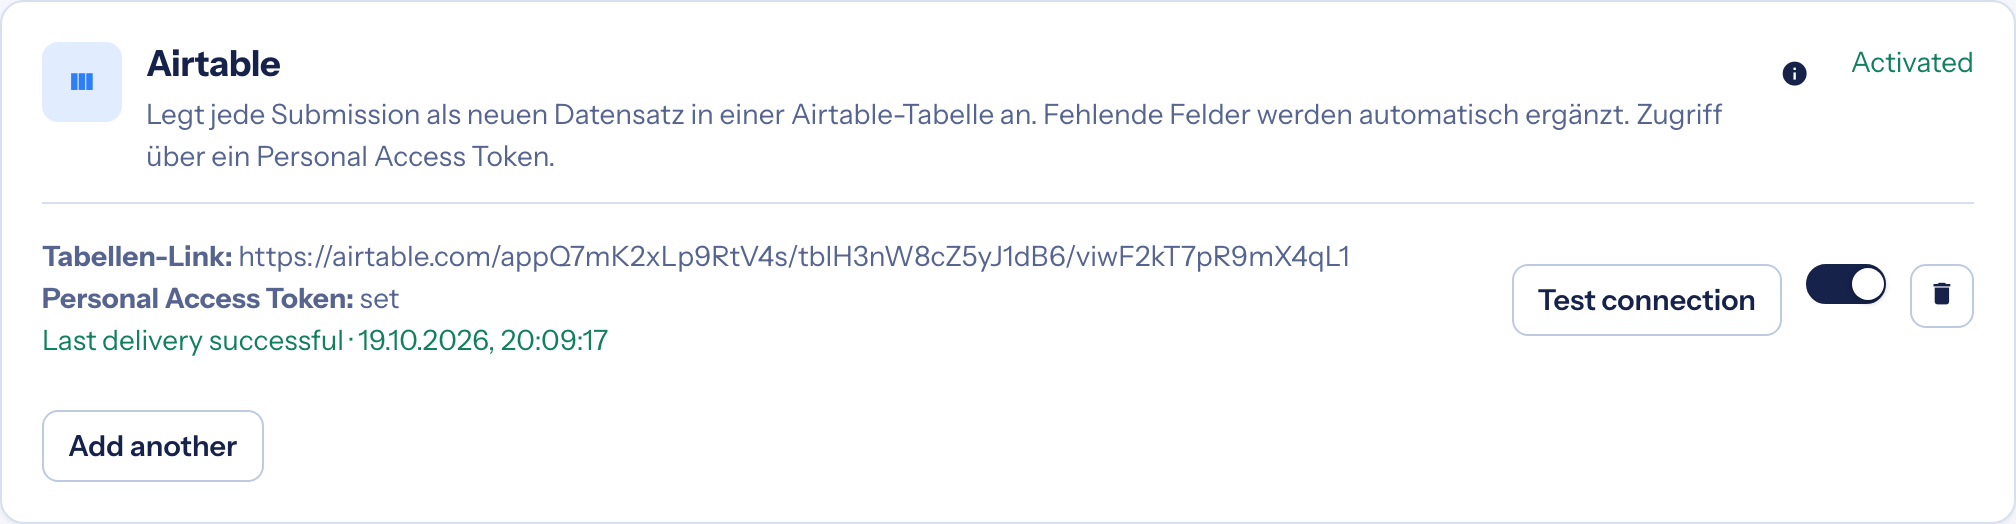
From now on, every new submission lands in the table as a record. The switch on the right pauses the integration without deleting its settings. With Add another you additionally write to a second table.
Which fields does Mailan create in Airtable?
- Zeitpunkt (time): when the submission arrived, as date and time (UTC).
- Formular (form): name of the form in Mailan, as text.
- Every form field under its
namefrom the HTML, as long text.
Matching ignores upper and lower case: if there is already a field E-Mail, the form field e-mail lands there.
Primary field: every record needs a name in Airtable, the table's first field. Mailan fills it with the form field of the same name. If there is none, Mailan uses name, email or subject, otherwise the form name. If the primary field is a formula or an autonumber, Airtable fills it itself.
Changing field types: you can switch a field in Airtable, for example to Email, Number, Checkbox, Date, Single select or Multiple select. Mailan then writes the values to fit. Airtable adds new select options by itself. Fields that cannot be filled from a form value (formulas, links, attachments, collaborators) stay empty.
If you delete a field in Airtable, Mailan creates it again with the next submission that contains it.
What do the error messages mean?
If the connection test or a delivery fails, the reason is shown below the integration's settings. The messages are currently in German:
- "Airtable lehnt den Token ab" (Airtable rejects the token): the token was copied incompletely, revoked or deleted. Create a new one, see Create a token.
- "Kein Zugriff auf die Base" (no access to the base): the base is missing under the token's Access, or one of the three scopes is missing. Add both in the token's settings; the token itself stays the same.
- "In der Angabe stecken keine Base- und Tabellen-ID" or "Base oder Tabelle nicht gefunden" (no IDs / not found): the link is wrong, often a share link from Share. Copy the address from the address bar, see The table's link.
- "Die Tabelle gibt es in dieser Base nicht (mehr)" (table no longer exists): the table was deleted. Enter the new table's link.
- "Airtable hat die Daten abgelehnt" (Airtable rejected the data): a value does not fit a field Airtable validates strictly. Airtable's own reason follows in brackets.
- "Airtable-Limit für Anfragen erreicht" (rate limit): Airtable allows five requests per second and base. Mailan retries automatically.
Mailan tries every delivery up to five times, spread over about half a minute. If it still fails, that submission is missing in Airtable. It is not lost, though: it stays stored in the dashboard in the form's Overview tab and can be exported there as CSV. After every change to the setup, use Test connection to check that everything works again.